Patina on Japanese Carbon Knives: What It Means
- Carbon steel knives are prone to rust if left wet, while stainless steel knives can develop "pitting" rust if not properly cleaned, especially after cutting acidic foods, and this type of rust can be irreparable Sakai Ichimonji Mitsuhide knife care guide.
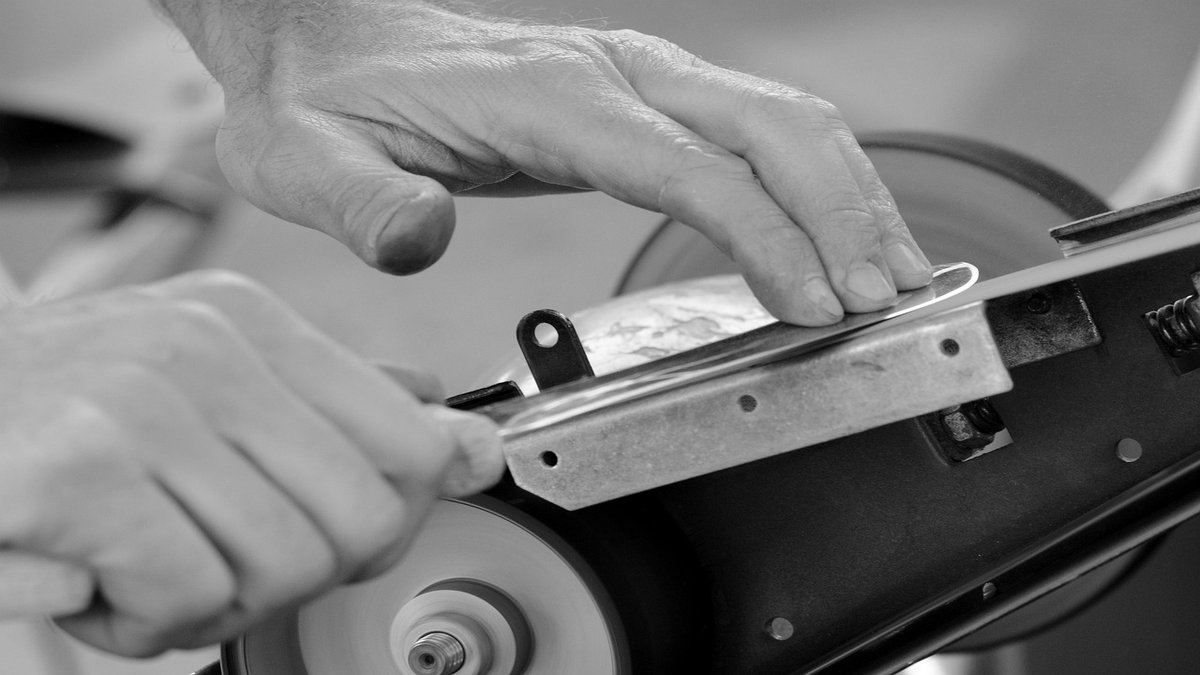
Last updated: April 2026
Affiliate Disclosure: We may earn a commission when you purchase through our links. This does not affect our editorial independence.
Quick Answer
- Carbon steel knives are prone to rust if left wet, while stainless steel knives can develop "pitting" rust if not properly cleaned, especially after cutting acidic foods, and this type of rust can be irreparable Sakai Ichimonji Mitsuhide knife care guide.
- Sharpening frequency for Japanese knives is typically 1-2 times per month, or when cutting onions makes your eyes water more than usual.
- Dishwashers are not recommended for Japanese knives due to strong detergents, high temperatures, and potential for blade damage.
- When sharpening, use a medium grit whetstone, such as a #1000 grit stone, for regular home maintenance and maintain an angle of about 15 degrees.
Japanese carbon steel knives are renowned for their exceptional sharpness and edge retention, qualities highly valued by chefs and home cooks alike. However, these knives require diligent care, particularly regarding rust prevention, due to the nature of their steel. Carbon steel (Hagane) is highly susceptible to rust if left wet, while even rust-resistant stainless steel can develop a type of corrosion called "pitting" if not cleaned properly after cutting acidic or salty foods Sakai Ichimonji Mitsuhide knife care guide. This pitting can penetrate the metal and is often irreversible. To maintain a Japanese knife, it is crucial to wash and dry it immediately after use, especially after contact with acidic or salty ingredients, and to avoid dishwashers. Regular sharpening, typically 1 to 2 times per month with a medium grit whetstone, helps maintain its superior cutting performance. "If you use a knife without proper knowledge, it can be ruined in an instant. To prevent this, it's important to understand the causes of damage and learn how to deal with them," advises Sakai Ichimonji Mitsuhide (translated from Japanese).
What is Patina and Why Does it Form on Carbon Knives?
Patina is a protective layer that forms on the surface of carbon steel knives, often appearing as a distinctive discoloration ranging from blues and purples to grays and blacks. This layer is a natural result of the steel reacting with moisture, acids, and oxygen over time, creating a stable oxide layer that actually helps to protect the underlying metal from more harmful red rust. While often aesthetically pleasing to knife enthusiasts, its primary function is practical: it acts as a barrier against corrosion. Understanding the formation of patina is key to appreciating and properly caring for carbon steel knives.
The fundamental reason for patina formation, and indeed rust, lies in the chemical composition of the steel itself. Japanese knives are often made from either steel (Hagane), which is a type of carbon steel, or stainless steel. Steel is particularly prone to rusting because it contains a high percentage of iron, which readily oxidizes when exposed to water and oxygen. Rust is essentially a chemical reaction where water and oxygen interact with the iron on the metal's surface, leading to the formation of iron oxides. This process can quickly degrade the blade if not managed. In contrast, stainless steel contains chromium, which forms a passive, protective layer that makes it much more resistant to rust. However, even stainless steel is not entirely immune; it can still rust under certain conditions, such as prolonged exposure to salt or strong acids, or if moisture is left on the blade.
The development of a patina on a carbon steel knife is a controlled form of oxidation. Instead of allowing uncontrolled red rust to form, which can pit and damage the blade, a patina creates a stable, dark oxide layer. This layer is usually a ferrous oxide that is less reactive and thus protects the blade from more aggressive forms of corrosion. Many users actively encourage patina formation by cutting acidic foods like onions, lemons, or meats, or by soaking the blade in coffee or vinegar solutions. This process is not just for protection; many find the unique patterns and colors of a well-developed patina to be a mark of character and a testament to the knife's use and care. It tells a story of the meals prepared and the hands that wielded it.
However, it's crucial to distinguish between a beneficial patina and damaging rust. A patina is typically uniform, dark, and smooth, enhancing the knife's appearance and protective qualities. Rust, on the other hand, is usually reddish-orange, powdery, and can lead to pitting and degradation of the blade's edge. If rust is allowed to form, it can shorten the knife's lifespan and compromise its performance. Therefore, while patina is welcomed, preventing actual rust remains a top priority for carbon steel knife owners. Proper care routines, which emphasize immediate cleaning and drying, are essential to guide the steel towards a healthy patina rather than destructive rust.
The allure of carbon steel knives, despite their higher maintenance, lies in their ability to achieve and hold a sharper edge compared to many stainless steel counterparts. This superior edge retention is often attributed to the microstructure of carbon steel, which allows for a finer grain and a more acute edge angle. However, this advantage comes with the trade-off of increased reactivity and susceptibility to corrosion. Patina helps mitigate this drawback by providing a natural defense mechanism. Without proper care, even the highest quality carbon steel knife will quickly succumb to rust, losing its aesthetic appeal and functional performance. The decision to use a carbon steel knife is often a commitment to a specific level of care, which includes understanding and managing the formation of its protective patina.
The Role of Water and Oxygen in Rust Formation
The primary culprits behind rust on any metal, including knife steel, are water and oxygen. Rust is a specific type of corrosion that occurs when iron or its alloys are exposed to both moisture and air. This electrochemical process results in the formation of iron oxides. On a microscopic level, when a water molecule comes into contact with the surface of a steel blade, it acts as an electrolyte, facilitating the movement of electrons. Oxygen molecules then react with the iron atoms, causing them to lose electrons (oxidation) and form iron oxide, which we commonly recognize as rust. The presence of impurities in the steel, as well as dissolved salts or acids in the water, can accelerate this process significantly. For instance, cutting salty or acidic foods like lemons, tomatoes, or brined meats and then leaving the knife uncleaned will rapidly promote rust formation.
The speed at which rust develops can be surprising. Even a brief period of moisture exposure, such as leaving a knife to air dry after washing or allowing food particles to remain on the blade, can initiate the rusting process. This is particularly true for high-carbon steel knives, which lack the chromium content that gives stainless steel its rust-resistant properties. The goal of proper knife maintenance, therefore, is to minimize the exposure of the steel to both water and oxygen, or at least to control the environment in which they interact to encourage a stable patina rather than destructive rust. This involves immediate and thorough drying, and in some cases, applying a protective layer of oil.
Distinguishing Patina from Rust
While both patina and rust are forms of oxidation, they are fundamentally different in their appearance, formation, and effect on the knife. Patina, as mentioned, is a stable, non-destructive oxide layer that typically forms slowly and evenly across the blade. It usually appears as shades of blue, gray, black, or even iridescent purples, and often has a smooth, almost polished texture. This layer is tightly adhered to the steel surface and acts as a passive barrier, preventing further, more aggressive oxidation. It's a sign of a well-used and cared-for carbon steel knife, and many owners cherish its unique character.
Rust, on the other hand, is a destructive form of oxidation. It typically appears as reddish-orange spots or patches, often with a powdery or flaky texture. Unlike patina, rust is not protective; it actively corrodes the underlying metal, leading to pitting, rough surfaces, and ultimately, structural damage to the blade. If left untreated, rust can eat away at the steel, compromising the knife's edge retention, strength, and hygiene. Rust can also spread rapidly, especially in humid conditions, turning a small spot into a larger problem. The key to maintaining a carbon steel knife is to encourage the formation of a beneficial patina while rigorously preventing the onset of destructive rust. This requires consistent and careful attention to cleaning, drying, and storage.
How Do You Prevent Rust on Carbon Steel Knives?
Preventing rust on carbon steel knives requires a consistent and diligent care routine, primarily focused on minimizing exposure to moisture and oxygen. The most critical step is to never leave the knife wet or with food residue on the blade for any extended period. This proactive approach helps encourage a beneficial patina while preventing destructive rust.
Immediately after using your carbon steel knife, wash it thoroughly with water. It is important to remove all food debris, as acidic or salty residues can accelerate corrosion. After washing, a highly effective technique to aid drying and further inhibit rust is to pour hot water over the blade. This causes the water on the surface to evaporate more quickly due to the heat, leaving the blade drier. Following this, wipe the blade completely dry with a soft cloth or paper towel. Ensure no moisture remains, paying particular attention to the spine, choil, and any areas where the blade meets the handle. Even small droplets can lead to rust spots.
For daily use, once the knife is thoroughly dry, simply storing it in a dry, well-ventilated place is often sufficient. However, for enhanced protection, especially for knives not used daily or for long-term storage, applying a thin layer of blade oil is highly recommended. Camellia oil (Tsubaki Abura) is a traditional and excellent choice for this purpose, as it is non-toxic and forms a protective barrier without becoming sticky or rancid. If camellia oil is not readily available, a light food-grade mineral oil or even salad oil can be used, though salad oil may dry out and oxidize more quickly, making it less ideal for very long-term storage Jikko Hamono rust prevention tips. To apply oil, put a few drops on a clean cloth or tissue and spread it evenly over the entire blade surface, then wipe off any excess. The goal is a thin, almost imperceptible film, not a thick coating, as too much oil can attract dust or even contribute to rust if it becomes rancid.
For long periods of non-use, beyond just oiling, wrapping the knife in newspaper before storing it is a traditional and effective method. Newspaper is absorbent and helps to draw away any residual moisture from the air, creating a drier micro-environment around the blade. Furthermore, the ink in newspaper contains oils that can provide an additional layer of rust protection. This combined method of cleaning, drying, oiling, and newspaper wrapping offers robust protection against rust for knives that will be stored for weeks or months. Proper storage in a knife block, magnetic strip, or knife roll in a dry area is also crucial to prevent accidental contact with other metals, which can cause "transfer rust" (moraiboshi) where rust from one metal transfers to another.
The importance of immediate cleaning cannot be overstated. Leaving a carbon steel knife with food particles or moisture, even for a short time, significantly increases the risk of rust. This is especially true after cutting highly acidic foods like citrus, tomatoes, or onions, or salty foods like cured meats, which can accelerate the oxidation process. By adopting a routine that prioritizes immediate post-use care, knife owners can ensure their carbon steel blades develop a beautiful, protective patina rather than succumbing to damaging rust. This meticulous attention to detail is part of the tradition and craftsmanship associated with Japanese knives, transforming maintenance from a chore into a ritual that enhances the knife's longevity and performance.
Immediate Post-Use Cleaning Protocol
The most effective rust prevention begins the moment you finish cutting. As soon as the knife is no longer in use, it should be cleaned. Start by rinsing the blade under running water to remove any loose food particles. Then, using a mild dish soap and a soft sponge, gently wash the entire blade, ensuring all residues, especially those from acidic or salty ingredients, are completely removed. Avoid abrasive scrubbers or steel wool, which can scratch the blade and remove any developing patina, potentially making it more susceptible to rust. The goal is to clean the blade thoroughly but gently, preserving its finish.
After washing with soap and water, an important step for carbon steel knives is to rinse them with warm or hot water. The residual heat from the hot water helps the blade to air dry more quickly, reducing the time it remains wet. This quick drying action is a simple yet powerful deterrent against rust formation. Once rinsed, immediately wipe the knife dry with a clean, soft cloth or paper towel. Pay meticulous attention to every part of the blade, including the area near the handle (the bolster or tang connection) and the spine, as moisture can linger in these crevices. Ensuring the blade is bone-dry before storage is paramount for preventing rust spots from forming.
Applying Protective Oil
For carbon steel knives, especially those not used daily or for long-term storage, applying a protective layer of oil is a crucial step in rust prevention. Blade oil, such as traditional camellia oil, creates a barrier that prevents moisture and oxygen from directly contacting the steel surface. Camellia oil is favored for its natural properties, being food-safe and less prone to becoming sticky or rancid compared to some other oils. To apply, place a few drops of oil onto a clean, lint-free cloth or a piece of tissue. Then, gently wipe the entire blade, ensuring an even, thin coating across the surface. The key is to apply a minimal amount and then wipe off any excess, leaving behind a fine, almost invisible film. A thick layer of oil can attract dust and potentially become gummy over time.
While specialized blade oils are ideal, for knives in daily use, some sources suggest that even a very thin layer of salad oil can offer temporary protection, though it is less stable and can oxidize more quickly than dedicated blade oils, making it unsuitable for long-term storage Jikko Hamono rust prevention tips. The purpose of the oil is to repel moisture and create a hydrophobic surface, significantly reducing the likelihood of rust. This oiling process should be performed regularly, particularly after each use for carbon steel knives, or before storing them away for any significant period. Consistent oil application, combined with thorough drying, forms a robust defense against corrosion, helping to preserve the integrity and beauty of the carbon steel blade.
Strategic Storage Methods
How you store your Japanese knife also plays a significant role in preventing rust and maintaining its condition. The primary goal is to keep the knife in a dry environment, away from moisture and potential contaminants. For daily storage, a knife block, a magnetic knife strip, or a knife roll are common and effective options. When using a knife block, ensure the slots are dry and clean. Magnetic strips offer excellent ventilation, allowing the blade to remain exposed to air, which helps prevent moisture buildup. Knife rolls are ideal for transport or for keeping knives protected in a drawer, but ensure the knives are completely dry before rolling them up.
For long-term storage, especially if a knife will not be used for an extended period, additional steps are recommended beyond just cleaning and oiling. A traditional and highly effective method is to wrap the oiled knife in newspaper. Newspaper serves a dual purpose: its absorbent paper helps to wick away any residual moisture from the surrounding air, and the oil in the printing ink can provide an extra layer of rust inhibition. After wrapping, store the newspaper-encased knife in a cool, dry place, ideally in a drawer or cabinet where it is protected from humidity fluctuations. Avoid storing knives in damp environments like near a sink or in unventilated drawers where moisture can accumulate. Proper storage not only prevents rust but also protects the blade from accidental damage and keeps it safely out of reach.
What Are the Risks of Using a Dishwasher for Japanese Knives?
Using a dishwasher for Japanese knives, whether carbon steel or stainless steel, is strongly discouraged by manufacturers and experts due to multiple risks that can lead to significant damage and premature deterioration. Mitsuboshi Cutlery, for example, explicitly states, "Dishwashers are absolutely not to be used, as they will cause damage and deterioration" (translated from Japanese) Mitsuboshi Cutlery care guide. The harsh environment inside a dishwasher is fundamentally incompatible with the delicate craftsmanship and materials of high-quality Japanese knives.
One of the primary risks is the potential for rust. Dishwashers typically use powerful alkaline or acidic detergents that are much stronger than the neutral dish soaps used for handwashing. These aggressive chemicals, combined with hot water and steam, can strip away any protective layers on the blade and aggressively react with the steel. This can cause rust to form even on "rust-resistant" stainless steel knives, let alone highly susceptible carbon steel blades. The heat and moisture also create an ideal environment for corrosion. Even if a knife is labeled as "dishwasher safe," it is generally understood in the knife community that this refers to basic, mass-produced knives, not specialized Japanese culinary tools.
Beyond rust, dishwashers pose a significant threat to the knife's handle. Many traditional Japanese knives feature handles made from natural wood, compressed plywood, or other organic materials. These materials are highly sensitive to the extreme temperatures and rapid temperature changes experienced during a dishwasher cycle, which can involve very hot water for washing and heated air for drying. Such conditions can cause wooden handles to swell, crack, warp, or become loose, weakening the handle's attachment to the tang (the part of the blade extending into the handle). The strong detergents can also degrade the finish and integrity of the handle materials, leading to discoloration and accelerated wear.
Another substantial risk is physical damage to the blade. Inside a dishwasher, knives are often placed alongside other dishes, cutlery, and cooking utensils. During the washing cycle, these items can shift, vibrate, and collide with each other. The delicate, finely ground edge of a Japanese knife is particularly vulnerable to chipping or dulling if it strikes another hard object. The tip of the blade can also be bent or broken. This type of impact damage is not only unsightly but can also significantly compromise the knife's cutting performance and require professional repair or extensive sharpening to correct. The combination of chemical corrosion, material degradation, and physical impact makes the dishwasher an unsuitable and damaging environment for any Japanese kitchen knife.
In summary, the convenience of a dishwasher comes at too high a cost for Japanese knives. The strong detergents, high temperatures, and risk of physical impact all contribute to an environment that can cause irreparable damage, from rust and handle degradation to chipped blades. Handwashing immediately after use, followed by thorough drying and proper storage, remains the only recommended method for preserving the longevity, sharpness, and aesthetic quality of these prized culinary tools. Ignoring these warnings can quickly ruin a knife that is designed to last a lifetime.
Detergents and Corrosion Risks
Dishwashers rely on powerful detergents to effectively clean dishes, but these chemicals pose a significant threat to knife blades. Unlike the mild, neutral dish soaps used for handwashing, dishwasher detergents are often highly alkaline or acidic. These strong cleaning agents are designed to break down tough food residues and grease, but they are also highly reactive with metals. When a knife blade, especially one made of carbon steel, is exposed to these harsh chemicals in a hot, moist environment, it accelerates the oxidation process, leading to rapid rust formation. Even stainless steel knives, which are generally more rust-resistant, can develop rust, specifically "pitting" rust (孔食), when exposed to these detergents, particularly if there are already microscopic imperfections or if the chromium oxide layer is compromised.
Pitting rust is particularly insidious because it involves the localized breakdown of the protective film on stainless steel, allowing corrosion to penetrate deeply into the metal. Once pitting rust occurs, it is often impossible to fully repair, as the corrosion extends into the core of the metal, causing irreversible damage. This makes the dishwasher a critical risk factor for both types of knife steel. The combination of strong chemicals, high temperatures, and prolonged exposure during a wash cycle creates an aggressively corrosive environment that can degrade the steel surface and compromise the knife's integrity, leading to a shortened lifespan and diminished performance. The chemical assault from dishwasher detergents far outweighs any perceived convenience.
Handle Degradation from Heat and Moisture
The handles of many Japanese knives are crafted from natural materials such as wood, compressed plywood, or other organic compounds. These materials are susceptible to degradation when exposed to the extreme conditions inside a dishwasher. The washing cycle typically involves very high water temperatures, often exceeding what these natural materials can withstand without damage. Following the wash, the heated drying cycle subjects the handles to rapid and intense temperature changes. This combination of heat and moisture causes wood to absorb water and swell, and then to dry out and shrink rapidly. Such repeated cycles lead to warping, cracking, and splitting of the wooden handle.
Furthermore, the strong detergents used in dishwashers can strip away natural oils and finishes from wooden handles, accelerating their deterioration. The glues or resins used to secure the handle to the blade's tang can also weaken, causing the handle to become loose or detach entirely. This not only makes the knife unsafe to use but also allows water to seep into the handle, potentially causing the hidden tang (nakago) to rust and corrode from within. While Western-style knives (Yo-bocho) with riveted handles may seem more durable, their wooden scales are still vulnerable to these effects, and water can collect in the seams, leading to rust. Protecting the handle is as important as protecting the blade for the overall longevity of a Japanese knife.
Risk of Blade Chipping and Physical Damage
Beyond chemical and material degradation, dishwashers pose a significant physical threat to the delicate blades of Japanese knives. Inside the confined space of a dishwasher, knives are often placed alongside other cutlery, plates, and cooking utensils. During the washing cycle, the powerful jets of water and the vibrations of the machine can cause these items to shift, clatter, and collide with each other. The extremely thin and sharp edge of a Japanese knife is highly susceptible to chipping, bending, or even breaking if it strikes another hard object, such as a ceramic plate, a metal pot, or even another piece of silverware.
The tip of a Japanese knife, often finely pointed, is particularly vulnerable to damage. A collision can easily cause the tip to bend or snap off, requiring extensive repair. Even if a major chip or break doesn't occur, repeated minor impacts can dull the finely honed edge, necessitating more frequent and intensive sharpening. This kind of damage is not only costly to repair but also compromises the knife's cutting performance and aesthetic appeal. The risk of such physical damage, combined with the chemical and heat-related issues, makes the dishwasher an unsuitable environment for maintaining the integrity and sharpness of any high-quality Japanese kitchen knife. Handwashing eliminates these risks, ensuring the blade remains pristine and the edge intact.
When Should You Sharpen Your Japanese Knife?
Knowing when to sharpen a Japanese knife is crucial for maintaining its superior cutting performance and ensuring an enjoyable cooking experience. Unlike Western knives, which might be used until noticeably dull, Japanese knives benefit from more frequent, lighter sharpening to keep their edges consistently keen. Several indicators can signal that it's time to bring out the whetstone.
One common and practical indicator is related to cutting onions. If slicing onions makes your eyes water more than usual, it's a strong sign that your knife's edge has dulled. A truly sharp knife severs onion cells cleanly, minimizing the release of irritants. A dull knife crushes the cells, releasing more irritant compounds into the air and making your eyes tear up more. Another culinary test is when cutting sashimi or delicate ingredients: if the slices lack sharp, clean edges, or if the knife drags rather than glides through the food, sharpening is needed. According to Tsukiji Aritsugu, a renowned Japanese knife specialist, these are clear signs it's time to sharpen (translated from Japanese) Japanese Knife sharpening guide.
Beyond specific food tests, a simple tactile check can reveal a dull edge. Gently place the blade's edge perpendicular to your fingernail and try to slide it. A sharp edge will "bite" into the nail and not slip, indicating it has enough microscopic teeth to grip. A dull blade, however, will slide smoothly across the nail without catching. This lack of "grip" means the blade has become rounded or worn down and can no longer effectively cut through food fibers. This test provides a quick and reliable assessment of your knife's sharpness.
The frequency of sharpening also depends on how often you use your knife. For home cooks who use their knives regularly, it is recommended to sharpen them 1 to 2 times per month. This consistent maintenance prevents the edge from becoming excessively dull, making each sharpening session quicker and easier. Professional chefs, who use their knives for many hours daily, might sharpen even more frequently, sometimes daily or every few days, to maintain peak performance. For knives that are only used occasionally, sharpening might be needed less often, but it's still important to check the edge before each use. A medium grit whetstone, such as a #1000 grit stone, is generally recommended for regular home maintenance, as it is fine enough to refine the edge without removing too much steel, keeping the knife sharp without excessive effort Mitsuboshi Cutlery care guide.
Ultimately, recognizing the signs of a dull knife and adhering to a consistent sharpening schedule are key to enjoying the full benefits of a Japanese kitchen knife. A sharp knife is not only more efficient and enjoyable to use but also safer, as it requires less force to cut, reducing the risk of slips and accidents. By paying attention to these cues, you can ensure your knife always performs at its best, making every cooking task a pleasure.
The Onion Test and Other Culinary Cues
One of the most common and easily recognizable signs that a Japanese knife needs sharpening is its performance when cutting an onion. If slicing an onion causes your eyes to water excessively, it's a strong indicator that the knife's edge is no longer performing optimally. A truly sharp knife will cleanly sever the cells of the onion, minimizing the release of the sulfur compounds that irritate the eyes. A dull knife, on the other hand, will crush or tear the onion cells, releasing a greater quantity of these irritants into the air, leading to more tears. This "onion test" is a practical, in-the-moment assessment of edge sharpness that many home cooks and professionals rely on.
Beyond onions, other culinary tasks can also reveal a dull edge. When preparing delicate ingredients like sashimi, a sharp knife is essential for creating clean, precise cuts that preserve the food's texture and appearance. If the knife drags through the fish or if the cut surfaces are ragged rather than smooth and glossy, it's a clear sign of a dull blade. Similarly, trying to slice a ripe tomato without crushing it, or cutting through paper-thin sheets of herbs, can expose a dull edge. A sharp knife will glide through these items effortlessly, whereas a dull one will struggle, requiring more force and potentially damaging the food. Recognizing these subtle shifts in cutting performance is key to knowing when your knife needs attention.
Fingernail Test for Edge Assessment
For a quick and reliable assessment of your knife's sharpness, the "fingernail test" is a simple and effective method. To perform this test, hold the knife with the blade facing away from you. Gently place the edge of the blade perpendicular to your fingernail, applying very light pressure. A truly sharp knife will "bite" into the nail slightly and stay put, or at least not slide easily. This indicates that the edge has enough microscopic teeth or a fine enough apex to grip a surface. This gripping ability is what allows a sharp knife to cut through food fibers efficiently.
Conversely, if the blade's edge slides smoothly and easily across your fingernail without catching or gripping, it indicates that the edge has become rounded or worn down. This dullness means the knife lacks the necessary microscopic sharpness to effectively cut. The fingernail test is a tactile way to confirm what you might already suspect from the knife's performance in the kitchen. It provides immediate feedback on the condition of your edge, helping you decide whether a quick touch-up or a full sharpening session on a whetstone is needed. It's a fundamental test for any knife enthusiast or professional to regularly employ.
Recommended Sharpening Frequency
The frequency with which you should sharpen your Japanese knife largely depends on its usage. For an average home cook who uses their knives regularly, sharpening 1 to 2 times per month is generally recommended. This consistent maintenance schedule helps to prevent the edge from becoming excessively dull, which in turn makes each sharpening session quicker and less intensive. By regularly refining the edge, you maintain a consistently high level of sharpness, ensuring that your knife is always ready for optimal performance. This proactive approach is less about restoring a completely dull edge and more about preserving an already keen one.
Professional chefs, who subject their knives to much heavier daily use, may need to sharpen their knives more frequently. Some professionals might touch up their knives daily or every few days to maintain peak performance throughout long shifts. The specific type of steel and the hardness of the blade can also influence how often sharpening is needed, with harder steels often holding an edge longer but requiring more effort to sharpen. For routine home maintenance, a medium grit whetstone, typically around #1000 grit, is ideal. This grit level is fine enough to refine and sharpen a slightly dull edge effectively without removing excessive amounts of steel, making it suitable for regular upkeep and ensuring the longevity of the blade.
How Do You Sharpen a Japanese Knife at Home?
Sharpening a Japanese knife at home with a whetstone is a rewarding skill that maintains the knife's exceptional cutting performance. The process involves several key steps, focusing on cleanliness, proper stone preparation, and consistent angle maintenance. Mastering these techniques ensures a sharp, long-lasting edge.
Before beginning, always start by thoroughly cleaning your knife. Use a cleanser or mild dish soap to wash off any dirt, grease, or food residue from the blade. This prevents contaminants from transferring to your whetstone and ensures a clean surface for sharpening. Once clean, gather your sharpening tools: a whetstone (a medium grit #1000 is recommended for general maintenance), a whetstone stand (or a wet towel to prevent slipping), and a dry towel for wiping.
Proper whetstone preparation is crucial. Soak your medium grit whetstone (#1000) in water for 5 to 6 minutes until it is fully saturated and no more air bubbles emerge. This ensures the stone remains lubricated during sharpening, allowing the abrasive particles to work effectively. If you don't have a dedicated whetstone stand, place the soaked stone on a wet, non-slip cloth or towel on a flat, stable surface to prevent it from moving during the process Japanese Knife sharpening guide.
Maintaining a consistent angle between the knife and the whetstone is perhaps the most critical aspect of sharpening. For most Japanese knives, an angle of about 15 degrees is ideal. This can be visualized as the thickness of one chopstick placed between the spine of the knife and the whetstone Mitsuboshi Cutlery care guide. For right-handed individuals sharpening the front (omote) side of a single-bevel Japanese knife (like a Yanagiba or Deba), hold the knife with your right hand on the handle, your index finger on the spine, and your thumb on the choil. Use the index, middle, and ring fingers of your left hand to press down on the blade where you are sharpening. Apply pressure when pushing the knife forward along the stone and release pressure when pulling it back. Move the knife slowly and steadily from the heel to the tip, ensuring the entire edge makes contact with the stone. Continue until a slight burr (kaeri) forms on the opposite side of the blade.
Once a burr is felt on the back (ura) side, it's time to sharpen the back. For single-bevel knives, the back side is typically sharpened almost flat against the stone, or with a very slight lift, to remove the burr and refine the edge. Perform just 2 to 3 light strokes on the back side, moving the knife from heel to tip. Repeat the process of sharpening the front and then lightly touching the back until the burr is removed and the edge feels smooth and sharp. If your knife is double-bevel (like a Santoku or Gyuto), you will sharpen both sides at the 15-degree angle, making sure to do an equal number of strokes on each side. The slurry (the muddy liquid) that forms on the stone during sharpening is essential, as it contains abrasive particles that aid in the sharpening process, so do not wash it away until finished.
After sharpening, thoroughly wash the knife again with cleanser to remove any grinding residue (the slurry) and metal particles. Then, wipe the entire knife, including the handle, with a dry towel. Store the knife in a dry, safe place. Regular sharpening, even for a short period each time, is more effective than infrequent, heavy sharpening sessions. With practice, maintaining a sharp Japanese knife at home becomes an intuitive part of kitchen routine, ensuring precision and pleasure in every cut.
Preparing Your Whetstone and Workspace
Before you begin sharpening, setting up a proper workspace and preparing your whetstone are crucial steps that ensure safety and effectiveness. First, ensure you have a stable, flat surface to work on, such as a sturdy countertop or table. This will prevent the whetstone from rocking or moving unexpectedly during the sharpening process. Next, gather your tools: the knife to be sharpened, your chosen whetstone (a #1000 grit medium stone is an excellent starting point for general sharpening), a whetstone holder if you have one, a bowl of water, and a clean cloth or towel.
The whetstone itself requires preparation. Most Japanese whetstones are "soaking stones," meaning they need to be fully saturated with water before use. Submerge your #1000 grit whetstone in water for 5 to 6 minutes, or until no more air bubbles emerge from the stone Japanese Knife sharpening guide. This ensures the stone remains lubricated and the abrasive particles are exposed, allowing for efficient material removal and preventing the stone from clogging with metal particles. If you don't have a dedicated whetstone holder to keep the stone stable, place a wet, non-slip cloth or towel under the stone. This simple trick will prevent the stone from sliding around, which is essential for maintaining a consistent angle and safe sharpening. Finally, ensure your knife is clean and free of any food debris or grease before it touches the stone.
Mastering the Sharpening Angle
Maintaining a consistent sharpening angle is the most critical element in achieving a sharp edge on a Japanese knife. For most Japanese kitchen knives, an angle of approximately 15 degrees is ideal. This angle is much more acute than those typically used for Western knives (often 20-25 degrees), contributing to the characteristic sharpness of Japanese blades. Visualizing this angle can be challenging for beginners, but a helpful trick is to imagine the thickness of a single chopstick placed between the spine (top edge) of the knife and the whetstone Mitsuboshi Cutlery care guide. This provides a tangible reference point for the correct tilt.
To execute the sharpening stroke, place the blade flat on the whetstone at the desired 15-degree angle. For a right-handed person sharpening the main bevel (omote) of a single-bevel knife, your right hand holds the handle firmly, while your left hand applies gentle pressure with the index, middle, and ring fingers to the blade surface directly over the area being sharpened. As you push the knife forward along the stone, apply consistent pressure. As you pull it back, ease the pressure slightly. This push-press, pull-release technique helps to maintain control and ensures even abrasion. Move the knife slowly and deliberately, covering the entire length of the edge from heel to tip, ensuring that all parts of the blade make contact with the stone at the correct angle. Consistency in this angle throughout the stroke is paramount for a uniform and sharp edge.
Sharpening the Front and Back of the Blade
The sharpening process involves working on both the front (omote) and back (ura) sides of the blade, though the technique differs for single-bevel and double-bevel knives. For single-bevel Japanese knives, such as Yanagiba or Deba, the majority of the sharpening work is done on the front side. After setting the 15-degree angle, you will make repeated strokes on the front side, pushing forward with pressure and pulling back gently, moving from the heel to the tip of the blade. The goal here is to create a "burr" (kaeri), a tiny wire-like edge that forms on the opposite side of the blade as metal is pushed over. You can check for the burr by gently running your fingertip perpendicular to the edge on the back side; it will feel like a slight roughness or curl.
Once a burr is established along the entire length of the front side, you then turn the knife over to the back side. For single-bevel knives, the back side is typically sharpened almost flat against the stone, or with a very slight elevation, for only 2 to 3 light strokes. The purpose of this is to remove the burr created on the front side and refine the edge. For double-bevel knives, such as Santoku or Gyuto, you will sharpen both sides of the blade at the same 15-degree angle. It's crucial to perform an equal number of strokes on each side to maintain the knife's symmetry and balance. During the entire process, the muddy liquid (slurry) that forms on the whetstone should not be washed away; it contains abrasive particles that are essential for effective sharpening. Only after you are completely finished sharpening should you clean the knife and wash off any remaining slurry.
What If My Knife Already Has Rust?
Finding rust on a prized Japanese knife can be disheartening, but it's often a recoverable situation if addressed promptly. Rust, while unsightly and potentially damaging, is not always the end for a carbon steel blade. The approach to removing it depends on the severity and type of rust. "Rust is not harmful to the body, so it is safe to cook with a knife that has some rust," states Jikko Hamono (translated from Japanese) Jikko Hamono care guide, offering reassurance that minor rust won't poison your food, though it should still be removed for the knife's longevity and performance.
For minor surface rust, often appearing as small reddish-orange spots, a simple solution can be to use a powdered cleanser. Apply a small amount of powdered cleanser directly to the rusted area and gently rub it with a soft cloth or sponge. The mild abrasive action of the cleanser can often lift the rust without damaging the blade's finish. It's important to rub gently and avoid harsh scrubbing, especially on a delicate blade. This method is effective for superficial rust that hasn't deeply pitted the steel.
If the rust is more widespread or stubborn, special rust removal tools are available and highly effective. Products like "Sabi-Tor" or "Miracle Clean" are essentially abrasive erasers designed specifically for removing rust from blades. These tools work by gently abrading the rusted surface. When using them, it's advisable to follow the existing grind lines (the visible lines from previous sharpening or finishing) on the blade. This helps to maintain the aesthetic integrity of the blade and prevents creating new, noticeable scratches. These erasers are particularly useful for larger areas of surface rust that a simple cleanser might not handle. After using any abrasive cleaner or eraser, always wash the knife thoroughly and dry it immediately, then apply a thin layer of protective oil.
For more significant rust, especially if it has started to pit the blade or if the knife is generally dull, sharpening with a whetstone is often the most comprehensive solution. As you sharpen the knife, the abrasive action of the whetstone will remove layers of steel, including the rusted areas. Starting with a medium grit stone (like a #1000) might be sufficient for moderate rust, but if the rust has caused chips or deep pitting, you might need to start with a coarser grit stone (e.g., #100-200) to remove the damaged material before moving to finer grits for sharpening and refinement. This method not only removes the rust but also restores the blade's edge, effectively killing two birds with one stone.
Regardless of the method chosen, immediate action is key when rust is discovered. The longer rust is left untreated, the deeper it can penetrate and the more damage it can cause. After removing rust, always follow up with proper cleaning, thorough drying, and application of a protective oil to prevent recurrence. This diligent care will help extend the life of your Japanese knife and keep it performing at its best.
Addressing Minor Surface Rust
Minor surface rust, often appearing as small, reddish-orange spots or a light film on the blade, is the easiest to address and usually poses no significant threat to the knife's integrity if caught early. For these superficial spots, common household items can often be effective. One recommended method is to use a powdered cleanser. Apply a small amount of the cleanser directly onto the rusted area. Then, using a soft cloth or sponge, gently rub the affected spot. The mild abrasive particles in the cleanser, combined with the rubbing action, can effectively lift and remove the surface rust without causing significant scratches or damage to the blade's finish.
Another simple approach for minor rust is to use a non-abrasive household cleaner like "Gekiochi-kun" (激落ちくん), a popular melamine foam sponge in Japan, which is known for its cleaning power on various surfaces. Rubbing the affected area with such a sponge can often remove light rust spots without the need for harsh chemicals or strong abrasives. The key with any of these methods is to be gentle. Avoid aggressive scrubbing or using steel wool, as these can scratch the blade, remove any beneficial patina, and potentially create new areas where rust can form more easily. After treating the rust, always wash the knife thoroughly with mild soap and water, dry it immediately and completely, and then apply a thin layer of protective oil to prevent future rust.
Specialized Rust Removal Tools
For more persistent or widespread surface rust that doesn't yield to mild cleansers, specialized rust removal tools offer a more potent solution. Products like "Sabi-Tor" or "Miracle Clean" are designed specifically for this purpose. These tools often come in the form of abrasive erasers or blocks that are impregnated with fine abrasive particles. They work by gently abrading the rusted surface, effectively sanding away the rust layer without deeply scratching the underlying steel. These tools are particularly useful for removing rust spots that have slightly set in or for larger patches of surface corrosion.
When using these rust removal erasers, it is important to follow the existing grind lines of the blade. This means rubbing the eraser in the same direction as the visible lines on the blade's surface. Doing so helps to maintain the knife's original finish and prevents the creation of new, unsightly cross-grain scratches. These tools are designed to be effective yet gentle enough not to cause permanent damage to the blade's aesthetics. After using a rust removal eraser, it is crucial to thoroughly wash the knife with mild soap and water to remove any abrasive residue and rust particles. Following this, dry the knife completely with a clean towel and apply a protective layer of blade oil to safeguard against future rust formation.
Whetstone Sharpening for Rust Removal
For significant rust, especially if it has led to pitting, discolored patches, or if the knife is already dull, sharpening with a whetstone is often the most comprehensive and effective method of rust removal. The abrasive action of the whetstone not only sharpens the blade but also removes layers of steel, taking the rust along with it. This method essentially grinds away the corroded material, revealing fresh, unblemished steel underneath. It's a dual-purpose approach that restores both the blade's edge and its surface integrity.
If the rust is moderate and hasn't caused deep pitting or significant damage, starting with a medium grit whetstone, such as a #1000 grit, might be sufficient. As you sharpen, the stone will abrade the rusted areas. However, if the rust has caused deeper pitting or chipping of the edge, it may be necessary to begin with a coarser grit stone, such as a #100 or #200 grit. These coarser stones remove material more aggressively, allowing you to effectively grind out the damaged, rusted sections. Once the rust is removed and the blade's profile is restored, you would then progress to finer grit stones (e.g., #1000, then #3000-5000) to refine the edge and achieve optimal sharpness. After sharpening and rust removal, always wash the knife thoroughly, dry it completely, and apply a protective oil to prevent the rust from returning.
How Does Handle Maintenance Impact Knife Longevity?
The handle of a Japanese knife is not merely a grip; it is an integral part of the knife's overall structure and plays a significant role in its longevity and performance. Proper handle maintenance is just as crucial as blade care, particularly because many traditional Japanese knives (Wa-bocho) feature handles made from natural woods that are susceptible to damage from moisture and neglect. Neglecting the handle can lead to hidden corrosion of the tang (nakago) inside, compromising the knife's structural integrity and potentially shortening its lifespan.
Traditional Japanese knives often feature a "hidden tang" construction, where a narrow extension of the blade (the nakago) is inserted into a hollow wooden handle and secured, often with a pin or simply by friction. This simple design, while elegant, leaves a small gap at the insertion point where the blade meets the handle. Water can easily seep into this gap, especially if the knife is not thoroughly dried after washing or if it's left to soak. Once inside, this moisture can cause the nakago to rust and corrode unseen. Over time, this internal rust can weaken the tang, causing the handle to become loose, wobble, or even detach from the blade. This not only makes the knife unsafe to use but can also lead to irreparable damage. Therefore, preventing water from entering this insertion point is paramount.
Even Western-style Japanese knives (Yo-bocho), which typically have a "full tang" design where the tang extends the full length of the handle and is secured by rivets, require handle maintenance. While these handles are generally more durable than traditional Wa-bocho handles, they are still often made with wooden or composite scales. Water can collect in the seams where the handle scales meet the tang, or around the rivets. If these areas are not thoroughly wiped dry, moisture can linger and lead to rust, both on the tang itself and potentially causing discoloration or degradation of the handle material. The strong detergents and high temperatures of dishwashers are particularly damaging to all types of knife handles, causing wood to warp, crack, and dry out, and compromising the integrity of glues and resins.
Proper handle care involves always handwashing the knife and ensuring that the entire knife, including the handle and the area where it meets the blade, is thoroughly dried immediately after use. For wooden handles, occasional oiling with a food-safe mineral oil can help to nourish the wood, prevent it from drying out, and enhance its resistance to moisture. This simple step can significantly extend the life of the handle and, by extension, the entire knife. By paying attention to the handle's condition and protecting it from moisture and harsh conditions, you ensure that your Japanese knife remains a reliable and safe tool for many years to come, preserving both its functionality and its aesthetic appeal.
The Hidden Threat of Tang Corrosion
The design of traditional Japanese knives, known as "Wa-bocho," often features a hidden tang, or "nakago." This means that a slender extension of the blade is inserted into a hollow wooden handle and typically secured with a single pin or simply by a tight fit. While this construction contributes to the knife's balance and aesthetic, it presents a unique vulnerability: the hidden tang is susceptible to rust and corrosion if moisture infiltrates the handle. Water can easily seep into the small gap where the blade enters the handle, especially if the knife is left wet or soaked after cleaning. Once inside, this trapped moisture, combined with oxygen, can cause the steel tang to rust unseen.
This internal corrosion is a significant threat to the knife's longevity and safety. Over time, as the nakago rusts, it expands and degrades, weakening the bond between the blade and the handle. This can lead to the handle becoming loose, wobbly, or even completely detaching from the blade, rendering the knife unsafe and unusable. Furthermore, the rusting tang can cause the wooden handle itself to crack or split from the pressure of the expanding rust. Since this damage occurs internally, it often goes unnoticed until it's too late. Therefore, meticulously drying the area where the blade meets the handle after every wash is paramount to prevent water ingress and safeguard the hidden tang from corrosive damage.
Maintaining Western-Style Knife Handles
While Western-style Japanese knives, or "Yo-bocho," typically feature a full tang design where the blade extends through the entire length of the handle and is secured by rivets, they are not entirely immune to handle-related issues. These handles often consist of two scales (pieces of material, usually wood, composite, or synthetic) riveted to the full tang. This construction is generally more durable than a hidden tang, but it still requires careful maintenance to ensure longevity. The primary concern for Yo-bocho handles is moisture accumulation in the seams where the handle scales meet the tang, or around the rivets.
If these areas are not thoroughly dried after washing, water can linger, leading to several problems. Moisture can cause rust to form on the exposed tang section within the handle, or even on the rivets themselves. For wooden handles, persistent moisture can lead to swelling, cracking, or discoloration of the wood scales. Additionally, the strong detergents and high temperatures of dishwashers are particularly detrimental to Yo-bocho handles, causing wooden components to warp, crack, and the glues holding them to degrade. Therefore, similar to Wa-bocho, it is crucial to handwash Yo-bocho knives and meticulously dry the entire handle, paying special attention to the seams and rivets, to prevent moisture-related damage and maintain the handle's integrity and appearance over time.
Preventing Handle Deterioration
Beyond preventing internal tang rust, proper handle maintenance also focuses on preserving the external condition of the handle itself. Many Japanese knife handles are made from natural wood, which is a porous material susceptible to drying out, cracking, and staining. Exposure to harsh chemicals, extreme temperatures, and prolonged moisture can accelerate the deterioration of wooden handles. Dishwashers, in particular, are highly damaging environments for any wooden handle due to their use of aggressive detergents, high heat, and rapid temperature changes, which can cause wood to warp, split, and lose its finish.
To prevent handle deterioration, always handwash your knife with mild soap and water, avoiding harsh scrubbing on the handle itself. Immediately after washing, thoroughly dry the entire knife, including the handle, with a clean towel. For wooden handles, occasional oiling can be highly beneficial. Using a food-safe mineral oil, or even a specialized wood oil, helps to nourish the wood, keep it from drying out, and enhance its natural resistance to moisture. Apply a small amount of oil to a cloth and rub it into the wooden surface, then wipe off any excess. This simple conditioning step can significantly extend the life of a wooden handle, maintaining its aesthetic appeal and structural integrity, and ensuring the knife remains comfortable and safe to use for many years.
Frequently Asked Questions
What is the difference between rust on carbon steel and stainless steel?
Carbon steel (Hagane) is highly susceptible to uniform red rust if left wet, as it lacks chromium. Stainless steel, on the other hand, is more rust-resistant due to its chromium content, which forms a protective oxide layer. However, stainless steel can still develop "pitting" rust (孔食) if exposed to strong acids, salts, or harsh dishwasher detergents, and this pitting can penetrate the metal and be irreparable Sakai Ichimonji Mitsuhide knife care guide.
Can salad oil be used for knife maintenance instead of specialized blade oil?
Yes, salad oil can be used for daily knife maintenance, especially for knives in regular use. However, it is less ideal for long-term storage compared to dedicated blade oils like camellia oil. Salad oil can dry out and oxidize more quickly, potentially becoming rancid and attracting dust, which may not provide as robust a protective barrier over extended periods Jikko Hamono rust prevention tips. For best results, camellia oil is recommended for long-term protection.
How often should I oil my carbon steel knife?
For carbon steel knives, it is advisable to oil them after every use, especially if they are not used daily, or before storing them for any significant period. This creates a protective barrier against moisture and oxygen. For long-term storage, wrapping the oiled knife in newspaper provides additional moisture absorption and rust prevention due to the ink's properties Jikko Hamono care guide.
Is it okay to use a rough sponge or scourer to clean my knife?
No, it is not recommended to use rough sponges, scourers, or steel wool to clean your Japanese knife. These abrasive materials can scratch the blade's surface, remove any beneficial patina, and potentially create new micro-scratches where rust can more easily form. Always use a soft cloth or sponge with mild dish soap for cleaning to preserve the blade's finish and integrity.
What kind of whetstone should a beginner use for sharpening?
For beginners and for general home maintenance of Japanese knives, a medium grit whetstone, typically around #1000 grit, is highly recommended. This grit level is versatile enough to refine a slightly dull edge and maintain sharpness without removing too much steel. It is also important to soak the whetstone in water for 5 to 6 minutes before use to ensure it is properly lubricated Japanese Knife sharpening guide.
Sources
- https://nagomi.mitsuboshi-cutlery.com/care/
- https://www.ichimonji.co.jp/pages/care?srsltid=AfmBOoq9VV2ahvqbWplCtpm00YUrRRhEfZHmCg19YzjCJA26AFFj2HHi
- https://www.tsukiji-go.jp/blog/2021/07/23/103009?srsltid=AfmBOorUImfyJfjlHfJZcRIE1wT3xx0Z-Bn2xlpziE23wQtPmq2C-nPW
- https://www.jikko.jp/c/knowledge/detail/tsukaikata/teire
- https://www.jikko.jp/news/sharpen/sabiboushi
- https://hocho.ichimonji.co.jp/maintenance/care-and-storage/anti-rust/
- https://fukubekaji.jp/contents/keep-sharpness-with-kitchen-knife-maintenance/
- https://detail.chiebukuro.yahoo.co.jp/qa/question_detail/q11115275686
Related Reading
- How to Remove Rust From a Japanese Knife
- How Often to Sharpen Your Japanese Knife: Maintenance Guide
- Why You Should Never Put Japanese Knives in the Dishwasher
- How to Care for a Japanese Carbon Steel Knife: Rust Prevention 101
- Best Carbon Steel Japanese Knives for Serious Cooks
— The Blade & Steel Team